UCSD AWS Educate - Cloud Virtual Machines for Coursework
(NOTE: This document is no longer maintained; please see the “AWS Educate EC2 Instances” Knowledge Base article at support.ucsd.edu)
A service of ITS/Educational Technology Services
Beginning with the Winter 2017 term, ITS/ETS offers students and instructors access to a centralized Amazon Web Services environment for deployment of course-related Virtual Machine instances, disks, etc.
Amazon charges by the hour for each Virtual Machine, Block Device, and other resources you will deploy. These charges are offset by AWS Educate grants provided by Amazon which average $50 per student per course. Virtual machines can cost anywhere from $0.01/hour for limited CPU/RAM, to $0.95/hour for standard 1-GPU hardware.
Any resources left running may quickly consume your budget, and in the interests of conserving these limited funds, your instructor, TA, or ITS/ETS may suspend your VM resources if they appear idle or “runaway”.
ITS/ETS monitoring scripts also will prevent operation of more than 2 simultaneous virtual machine instances per student login (1 t2.micro, and 1 other), or more than 500GB of storage, without prior instructor approval.
All use of UCSD’s AWS Educate environment is subject to monitoring by ITS/ETS and course TA/Instructors at any time. Please do not use these resources for outside coursework or for personal projects.
UCSD students are eligible for separate personal AWS accounts, with $75-$100 annual promotional credit, via the AWS Educate program: visit https://www.awseducate.com/Application?apptype=student for details.
We encourage you to register with this program, but participation is strictly optional.
Student Login to UCSD AWS Educate Console
Point your browser at https://awsed.ucsd.edu/
You will be presented with a standard UCSD Single Sign-On login page.
Enter your UCSD login username (excluding any @ucsd.edu or @eng.ucsd.edu), and your password.
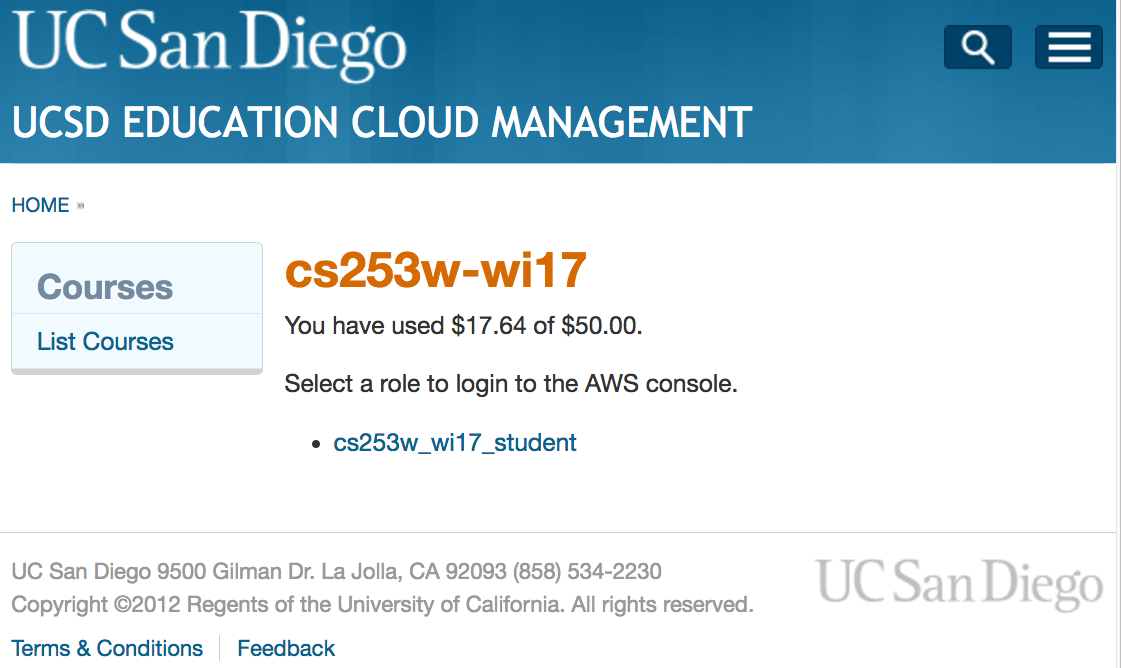
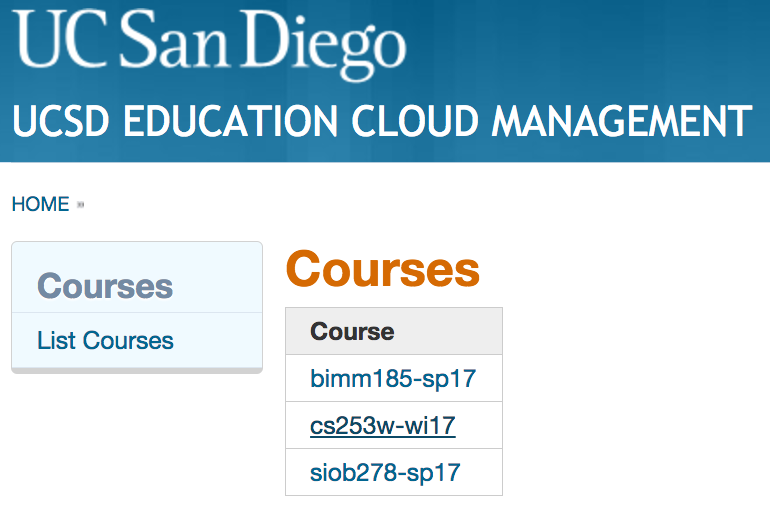
Next, select the course (e.g. CS 253) you plan to work within. Your AWS credit allocation (in dollars), as well as overall usage, will be displayed. Note that activity may take up to 12 hours to be included in your balance.
Launch AWS EC2 Console
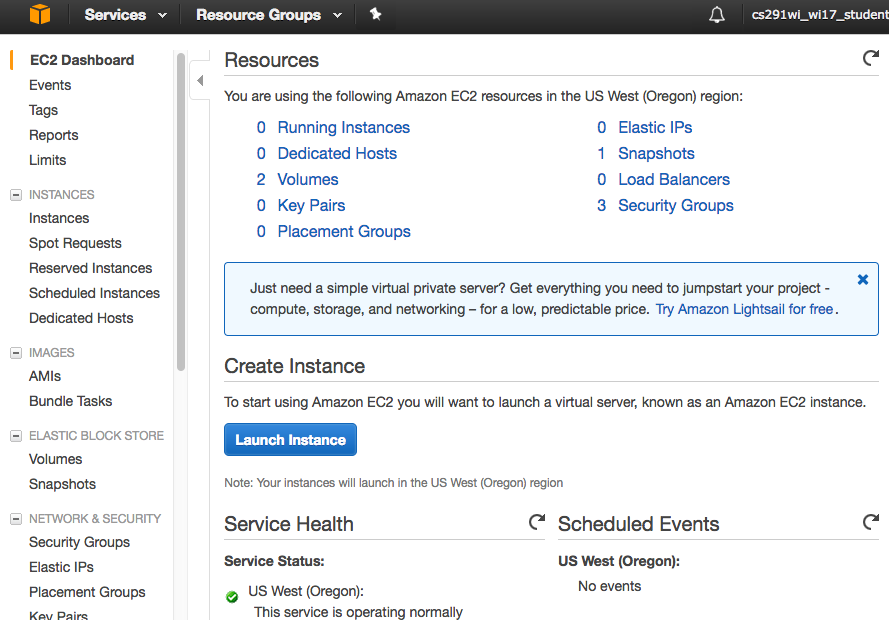
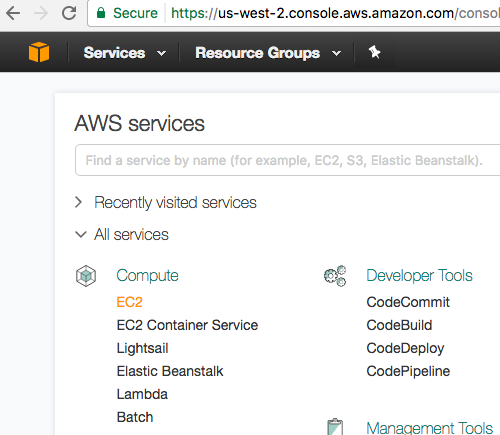
Most coursework will take place within EC2 (Elastic Compute Cloud) virtual machine instances that you will launch. After clicking on the desired AWS Role (e.g. “cs291wi_wi17_student”), you will be redirected to the AWS Console, where you may choose “EC2” from the “All Services” menu.
Note that all UCSD AWS Educate activity is currently limited to the US-West-2 (Oregon) data center.
Launch EC2 Instance
Once in the console, you may launch a virtual machine Instance via the blue “Launch Instance” button.
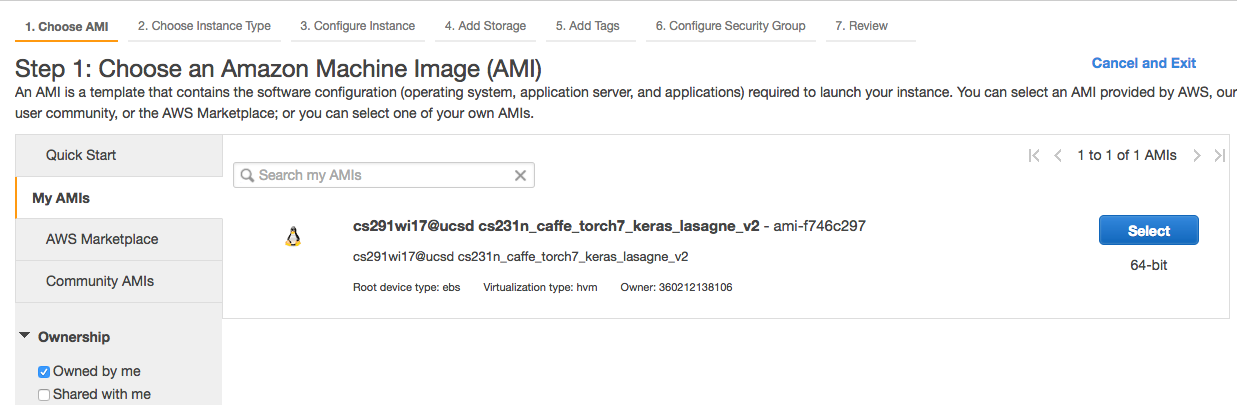
Step 1: Choose Machine Image (template)
Your instructor may restrict you to a specific Amazon Machine Image template, else you may choose any relevant image from Amazon’s catalog. To view instructor-supplied images, select “My AMIs”:
Step 2: Choose Instance Type (CPU/RAM/GPU configuration)
Amazon offers a wide array of hardware types, ranging from trivially small (and cheap), to enormously powerful (and tremendously expensive). Your instructor has selected a subset of instance types for use in this course; choosing others will result in a “permission denied” error.

All courses will have access to the “t2.micro” (1CPU, 1GB RAM, no GPU) instance type, $0.012/hour, which we recommend you use to become familiar with AWS, launching instances, and logging into the virtual machines.
Other common instance types used by courses include “g2.2xlarge” (standard 1-GPU instance, $0.65/hour), and “p2.xlarge” (advanced 1-GPU instance, $0.95/hour). See Amazon documentation for a full price list. Your instructor/TA will determine which instance types are available for your course.
Step 3: Configure Instance Details
We don’t suggest you modify any of the settings on this screen. Click on “Next: Add Storage”
Step 4: Add Storage
You may increase the storage allocated to your Virtual Machine on this screen. Please check with your instructor or TA before provisioning volumes larger than 200GB.
Step 5: Clear Tags
Our shared AWS Educate environment doesn’t currently permit students to assign tags to their Instances.
You may delete the default “Name” tag to prevent a harmless warning later in the process.
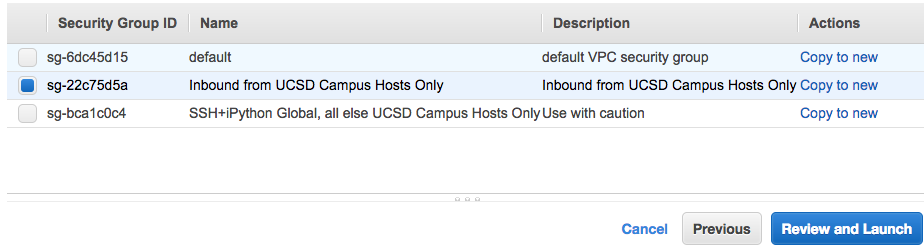
Step 6: Configure Security Group
A “Security Group” is essentially a per-instance firewall configuration.
Please click “Assign Security Group: Select an existing group”, then choose a Security Group from the options listed. (Your instructor may limit to you a subset of the options displayed, and we do not currently permit students to configure custom security groups.)
Click “Review and Launch” to proceed to the final screen.
Step 7: Review Instance Launch
Please review the options you have chosen, and click “Launch” when you are ready to launch.
Step 8: Generate (or Choose) SSH Key

The final step requires you to associate an SSH public key with the instance, to enable you to login to the VM via SSH.
If you have not previously configured a public key, please generate one. Since key names are shared among all UCSD AWS Educate users, please name your key according to your account name (e.g. “jsmith-cs291”).
Once you have generated a key, store the private key .PEM file into your SSH client, and treat it as you would a password.

Some types of group work may require you to share a key with team members; in these instances we recommend you create a new key specifically for that purpose, rather than sharing an existing key you’ve used for individual work.
If you’ve previously generated a key within AWS Educate, you may instead choose its name from the dropdown list.
Step 9: Launch!
Choose “Launch Instances” to launch your instances. You may see a harmless warning:

Click on the instance identifier ( i-0eb02951330daee3e) to view your instance details in the EC2 Console:
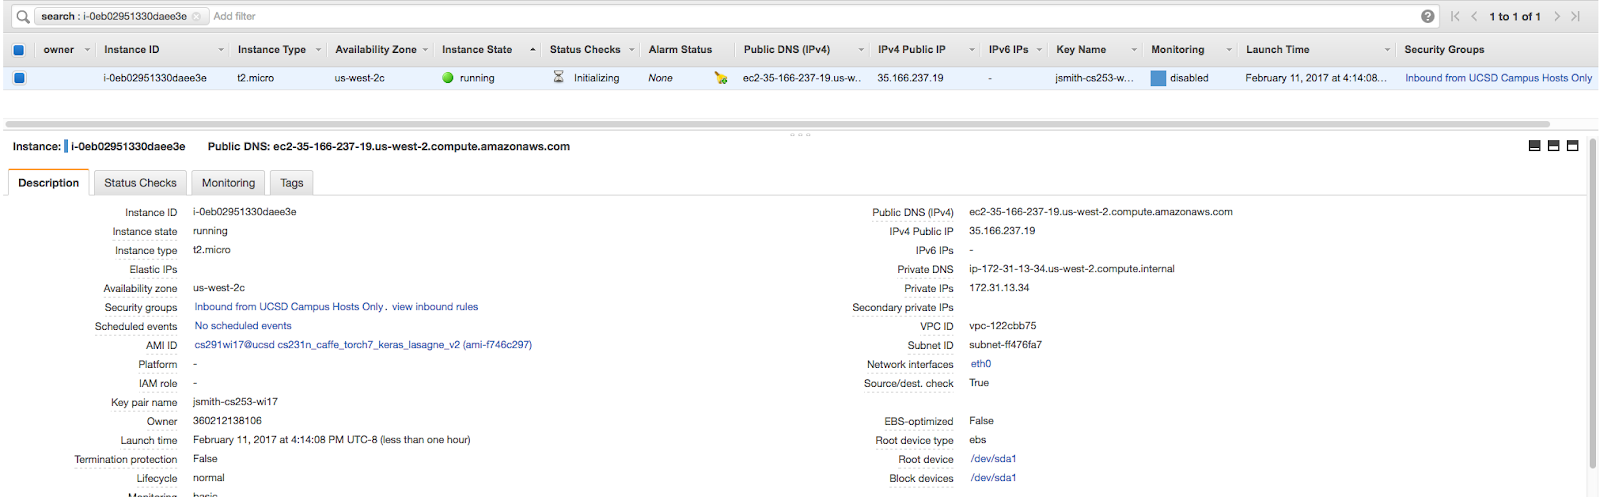
Your instance should be tagged as yours (via the “owner” tag) within 5 minutes after launch.
Until that happens, you won’t be able to Stop your instance. (Please note that Amazon charges a minimum of 1 hour for each instance launched.)
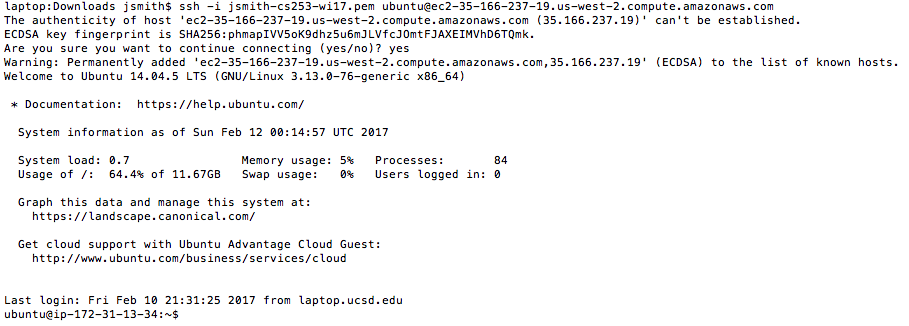
Step 10: Connect to your instance via SSH
To connect via SSH, utilize the private key chosen above, and SSH into the “Public DNS” name shown in the EC2 console. Your username may be “ec2-user” or “ubuntu” depending on the AMI image used.
Step 11: Shut down your instances!
Please conserve your AWS Educate allocation by shutting down your EC2 instances when they are idle.
To prevent accidental data loss, you may “Start” and “Stop” instances, but may not “Terminate” (destroy) virtual machines. Please contact ITS/ETS to request termination/removal of unneeded instances, otherwise they will be removed automatically at the end of each quarter.
Other features of interest:
- You may create standalone EBS volumes, attach them to instances you have created, and may also detach/destroy them as needed. The 200GB guideline is not currently enforced, but to manage overall resource consumption we suggest you consult with your instructor or TA before exceeding it.
- Team/Group support is available: ITS/ETS can shift team members’ budgets into a Team Leader’s account, and can give team members permission to manage resources created by other members.
- Command-line access to AWS Educate is now available on ITS/ETS "ieng6" servers; see draft instructions at: https://go.ucsd.edu/2uMBafK . (Feature enabled on a per-course basis.)
Planned Features / Known Limitations
Please contact ITS/ETS for assistance with any of the following EC2 operations.
(We hope to support direct access to many of these features during Summer 2017.)
- Support for EC2 Spot Instances
- Full support for S3 data storage; limited support available now.
- Modifying EBS volumes after initial creation (e.g. resizing, reattaching)
- Creation of volume snapshots and AMI images
- Network-related configuration (creation of security groups, elastic IP addresses, IPv6, or subnets)
- Deletion of Key Pairs
Questions / Help / Support
If you have any questions about use of AWS Educate in your course, please first consult your TA or Instructor, as they understand the specific requirements of your course.
You may also contact the ITS Help Desk ( servicedesk@ucsd.edu ; https://servicedesk.ucsd.edu/ ).
When contacting ITS, please be sure to specify that your AWS usage is course-related, and identify the course.
This service is brand-new, and features are currently quite limited. We welcome your feedback, and look forward to expanding available functionality over the coming quarters.